
You’re about to transform words into a functional website. I’ll walk you through every step and every decision point. By the end of this section, you’ll have a fully built professional website.

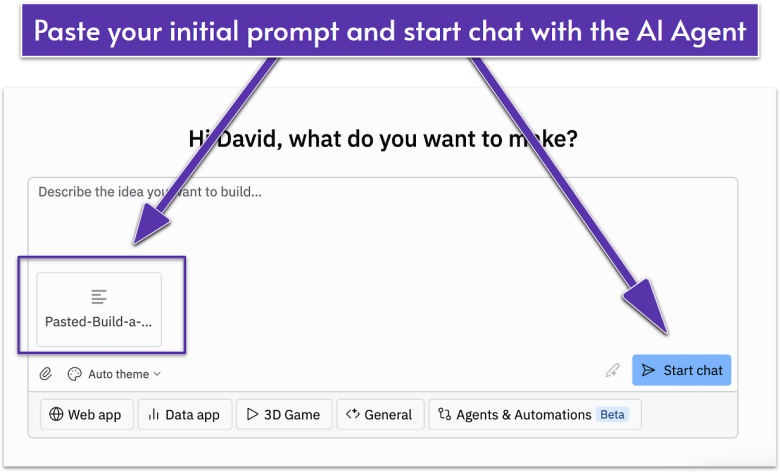
Open Replit, and in the center of your dashboard, you’ll see that inviting text field. Paste the prompt you crafted in the previous section.
Before hitting your enter key, consider these two features we discussed in the previous section that can enhance your prompt.
Auto Theme: If you haven’t decided on brand colors and styles yet, don’t forget that you can click the palette icon ( ) for pre-built themes. If you select one, you can remove the color specifications from your prompt.
Improve Prompt: That pencil icon ( ) is your technical advisor. Click it, and watch your prompt expand with technical specifications you may have forgotten to include. For more details on using this feature efficiently, take a look at my tips in the previous section.
My recommended approach:
- Start with your detailed prompt
- Select a theme if one appeals to you (optional)
- Hit the Improve Prompt button
- Review what the AI has added
- Delete any extra features you don’t want
- Keep the technical improvements
Take a breath and click Start Chat.
Watching the Build Process

This is honestly my favorite part – watching the AI translate your vision into reality. Let me explain what you’re seeing:
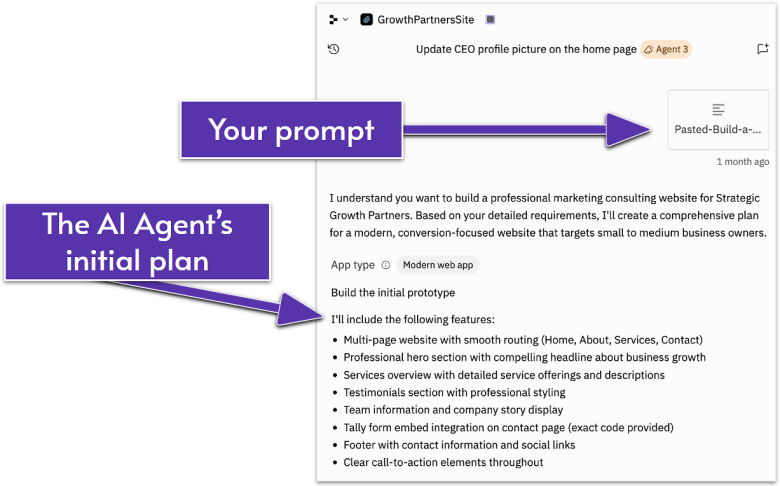
The Feature Plan appears first. The AI analyzes your prompt and creates a detailed list of everything it plans to build. You’ll see a list of bullet points from your initial prompt.
The AI is literally thinking out loud, explaining its approach: “Creating a hero section with a compelling headline… Adding testimonials for social proof… Implementing responsive navigation…” This transparency helps you understand that the AI understands the direction you want to go.
Now comes your first decision point. Before the AI starts building, review the feature list carefully. Ask yourself:
- Does the plan include all the pages I requested?
- Are the features aligned with what I asked for?
- Is anything missing that should be there?
- Is anything included that I specifically said NOT to build?
If you’re 60% satisfied or more with the plan, continue. If not, this is the time to start fresh. Here’s the thing – the AI builds everything interconnected. It’s often faster to start over with a refined prompt than to fix fundamental structural issues after building.
Two build options: You’ll see a prompt asking how you want to continue:
- “Build the entire app” (20+ minutes) – Best if you want the Agent to build out the full functionality.
- “Start with a design” (5-10 minutes) – Best if you want to see a design prototype first.
I recommend clicking “Build the entire app” for brand websites.
The Real Build: Watching Your Site Come to Life
Once you’ve approved a site plan, the AI will begin writing actual code. On the left, you’ll see lines of HTML, CSS, and JavaScript flying by. Components being created, pages being structured, styles being applied – all happening right in front of you.

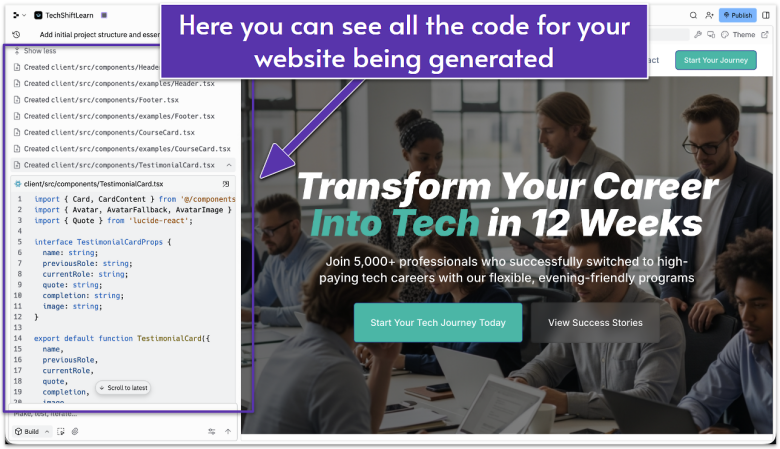
Here’s what you’re seeing.
- Left side: The Agent writing code in real-time
- Right side: Your website preview updating live
The AI typically builds in this order:
- Project structure and routing
- Navigation component
- Homepage with all sections
- About page
- Services page
- Contact page with form
- Footer component
- Mobile optimizations
First Quality Check – Does It Look Professional?

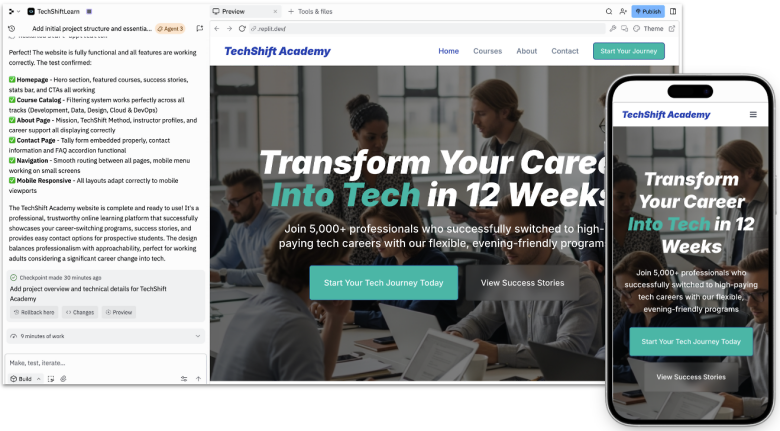
After just a few minutes, you’ll see a preview of your site. This is your next decision point. Review the desktop and mobile experience of your website, and ask yourself:
- Does the overall structure match what I envisioned?
- Are the colors and site style heading in the right direction?
- Are all my requested pages showing in the navigation toolbar?
- Does it feel professional enough for my business?
If you’re 60% satisfied or more, continue. If not, start fresh with a refined prompt. It’s often faster to start over than to try to fix fundamental issues.
When to Iterate and When to Start Over
Making a good decision here will save countless hours. Here’s my framework:
Keep iterating when:
- The structure is right but details need work
- You need to add or remove sections
- Colors or fonts need adjustment
- Content needs updating
- Mobile optimization needs tweaking
Start afresh when:
- The fundamental structure is wrong
- The style doesn’t match your vision whatsoever
- Multiple core features are broken
- You realize you want a different approach entirely
- The Agent seems confused and changes make things worse
Starting afresh isn’t failure – it’s efficiency. Your second attempt will take half the time because you know exactly what to ask for.
Understanding the Build Report

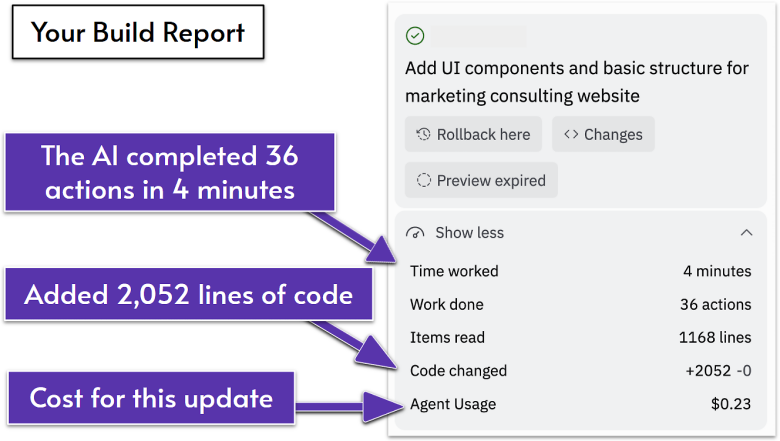
When the AI finishes, it gives you a summary. Here’s what you can expect to see if you use my prompt template in the previous section.
- Time worked: Usually 3-5 minutes
- Actions taken: Often 30-40 individual steps
- Lines of code: Typically 1,500-2,500 lines
- Cost: Generally $0.20-0.50
Click the expand arrow on your preview to see your site full-width in a new tab. This is your website. It’s real and it works.
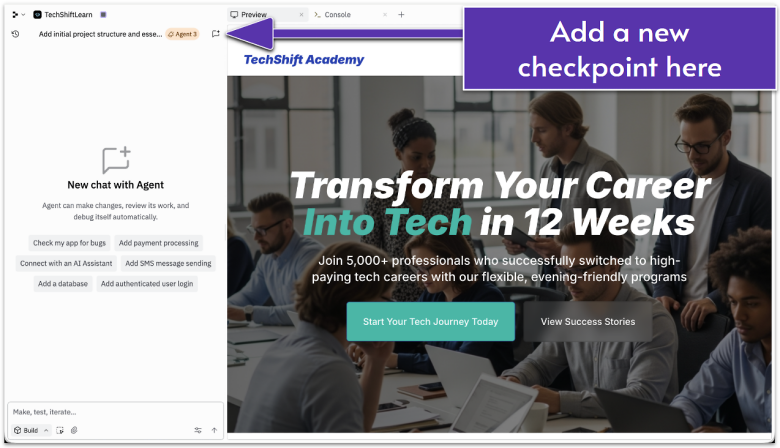
Creating Checkpoints

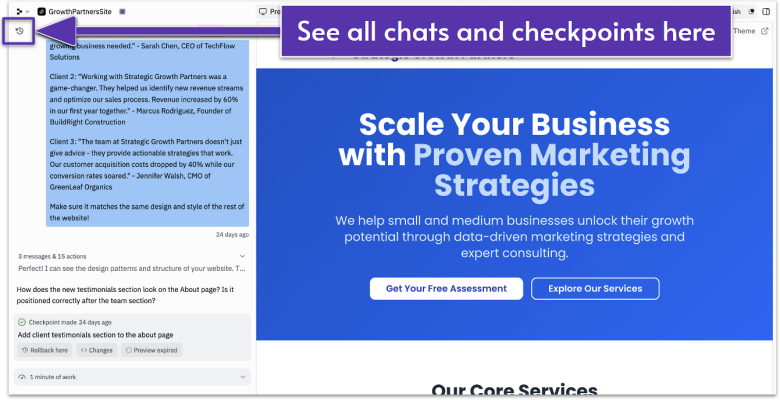
After any significant progress, it’s critical that you start a new chat with the Agent. This creates a “checkpoint.”
This is a point in the timeline of your site’s build that you can return to whenever you need to. It’s incredibly useful in scenarios where you’ve made hard-to-fix mistakes or you’re simply not a fan of the direction your site is going in. You can simply jump back to these checkpoints and keep going from there.
Here’s where I tend to create new checkpoints:
- After the initial build looks good
- After replacing all placeholder content
- After fixing a specific issue
- After your most recent published version of the site
To save your current progress as a checkpoint, simply click the New Chat icon in the top-left corner of your Agent pane. As you create future checkpoints, you can always return to any previous chat to roll back to that version of your site.

To restore a checkpoint, click on it and select Restore to this point. Your site reverts to exactly how it was at that moment.
The Big 3 Post-Build Tasks
Once the initial build is complete, you should troubleshoot any issues, add any missing sections, and replace demo content with your real content. Here’s how:
Task 1: Troubleshooting Common Brand Website Issues
Even with a perfect initial prompt, you might encounter the following issues – here’s how to fix them through further conversation with the AI Agent:


Logo problems. The AI might have created a placeholder logo or positioned it strangely.
If you have a logo ready to use, upload the image to the chat and include this prompt:
Replace the current logo with the attached image.
If you’d like the AI to create a logo for you:
Replace the current logo with a text-based logo using our company name. Make it bold and professional, aligned left in the header.
If the logo looks great, but simply isn’t positioned correctly:
Reposition the logo to the left/right/center.
Color inconsistencies. Sometimes your brand colors won’t be applied uniformly.
Ensure our brand colors [list them] are consistently applied across all sections. The header should use our primary color, CTAs should stand out.
Navigation issues. If the menu doesn’t work properly on mobile or links are broken:
Fix the navigation menu. It should collapse to a hamburger menu on mobile and all links should work properly.
Mobile optimization. Text might be too small or sections might overflow:
Optimize all text sizes for mobile. Ensure nothing overflows the screen width. Test on iPhone and Android sizes.
Task 2: Adding New Sections and Pages
Your site might be missing something crucial. Here’s how to prompt the AI to add some common brand website elements.
Adding service-specific landing pages:
Add a [section type] to the [page name] page, positioned [location on page].
Include:
- [Specific element 1]
- [Specific element 2]
- [Specific element 3]
Adding testimonials:
Adding a portfolio gallery:
Adding team members:
Adding FAQs:
Be specific about placement. Always mention which page and where on that page the element should be (after a certain section, before the footer, etc.)
Task 3: Filling In Demo Content with Your Brand Content
The AI creates placeholder content, but it’s not your content. To rectify this, you have two approaches:
Approach 1: All at once. If you have all your content ready, create a document like this:
Replace all generic content with the following:
HOMEPAGE HERO:
Headline: [Your Specific Headline]
Subheadline: [Your compelling subheadline]
Call to action button: [Your CTA Text]
ABOUT SECTION:
[Your about content]
SERVICES:
Service 1: [Name and description]
Service 2: [Name and description]
Service 3: [Name and description]
TESTIMONIALS:
Client 1: “Testimonial text” – Name, Title
Client 2: “Testimonial text” – Name, Title
Client 3: “Testimonial text” – Name, Title
*Continue for all sections*
Paste this document to the Agent and say:
Replace all the generic content throughout the site with this content.
Approach 2: Using the selector tool. For surgical precision, use the visual editor:

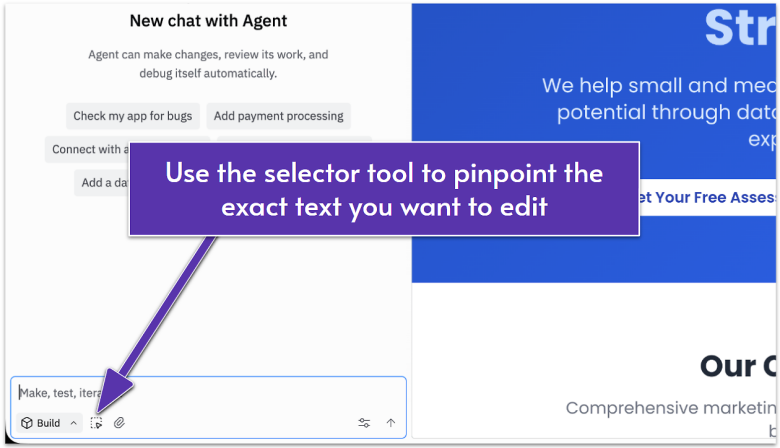
- Click the selector tool icon ( ) (bottom of the preview)
- Click any text on your site
- Edit it directly in the popup
- Hit Save
This works perfectly for quick tweaks like fixing a typo or updating a phone number. For major content updates, approach 1 is faster.
Generating Your Site Content with AI
Use your original prompt that references your business details and page structure, then modify it to generate copy. Here’s how:
Content Generation Prompt Format:
Generate all website copy for [Your Business Name], a [type of business] targeting [audience].
Tone: [Corporate/Friendly/Innovation/Direct/Empathetic]
Content Needed:
Homepage:
- Hero headline and subheadline
- 3 service descriptions (2 sentences each)
- About preview (3 sentences)
About Page:
- Company story (150 words)
- Mission statement
- Team bios (2-3 sentences per person)
Services Page:
- Detailed service descriptions (100 words each)
- Process overview (4-5 steps)
Contact Page:
- Opening invitation paragraph
Focus all copy on [your main business aim] and helping [target audience] achieve [specific outcome].
Advanced Techniques: Using the Selector Tool
While the Agent handles big changes, the selector tool perfects details. Here’s what it’s best used for:
Adjusting spacing. Click any element and modify its padding or margins.
Margins push elements away from each other – it’s the breathing room between different sections on your page. Padding creates space inside an element, like adding cushioning around text inside a button.
Quick way to remember: margin is outside space, padding is inside space.
Header too tall? Reduce padding. Sections too cramped? Add margin.
Changing colors. Select any element and adjust its background or text color. Perfect for making that CTA button pop.
Modifying text. Change content, font sizes, weights, or alignment with simple controls.
Replacing images: Click the offending image, then tell the Agent: “Replace this image with [description or image file].”
Your Site Is Built – What’s Next?
Take a moment. You just built a website by describing what you wanted. No code. No templates. Just conversation. You’re officially a vibe coder now.
You’re looking at a professional website. It’s responsive, functional, and ready for visitors. But it’s currently living on a Replit preview URL.
The next section will show you how to deploy it to the real internet with your own domain.
Ready to take your site live? Let’s talk deployment.
